Friday, October 22, 2010

Fiesta Bowl

If you haven't noticed lately, I've been cooking a lot. The problem with cooking and baking a lot is that you end up eating too much and feeling kinda crummy afterward.

I've decided to join some friends in a 10 Day Cleanse, where I'm only allowed to eat foods that don't have junk in them. (i.e. cook with lean meats and lots of veggies, and stop eating so much of it!)

This, of course, poses a problem for me, when 80% of my recipes are probably not so healthy. Of course, there are some great options that ARE healthy (i.e. This Chicken Tortilla Soup recipe), but I always struggle to find the time and willpower to spend that much time in the kitchen when I'm already hungry!

Suddenly, it came to me - a friend of mine emailed me a recipe a while back that sounded like some sort of Mexican dish with black beans (score!) and shredded chicken. I looked it up, and here's what I had to go on:

"Saute peppers (red, orange, green) and onions in pam olive oil flavor. Add black beans and corn. Throw them in between two whole wheat tortillas with low fat cheese and non fat sour cream. Yum."

So, while I modified it a little bit, here's what I ended up with.

The Recipe

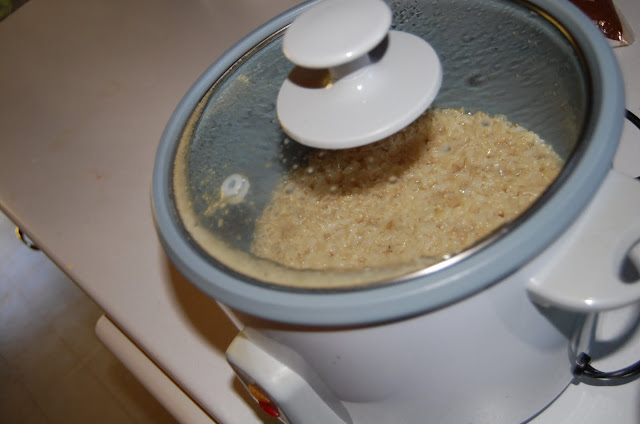
1 large chicken breast, poached and shredded
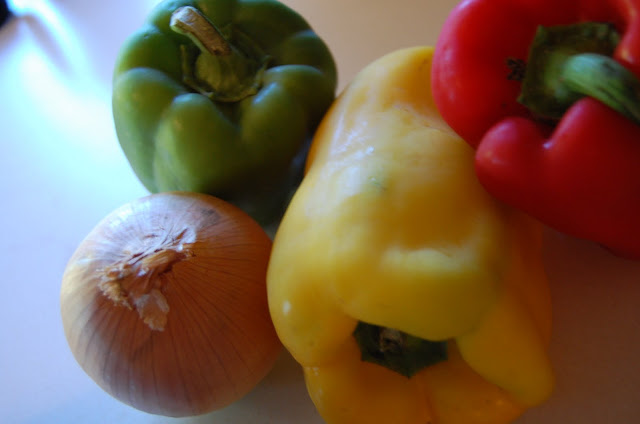
1 large yellow pepper, diced
1 medium white onion, diced
3 large mushrooms, diced
1 can black beans
1/2 pkg frozen corn
Salt, pepper, chili powder, red pepper flakes and cayenne pepper to taste while sauteeing

Putting it All Together

You start by poaching a chicken breast like so:


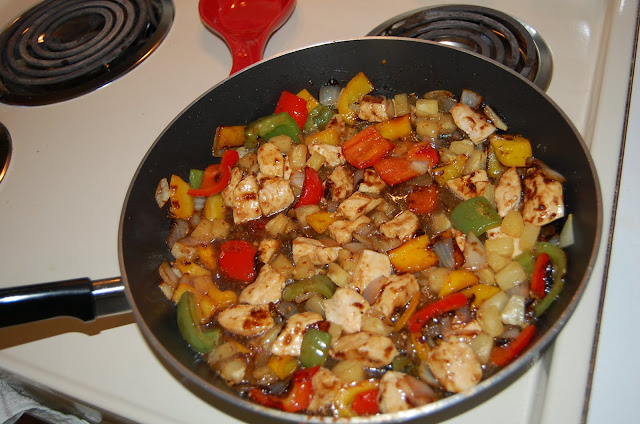
While you're waiting, you then dice up all your goods - pepper, onion and mushrooms, and saute it in olive oil spray like so:


And then, the dreaded shredding of the chicken:


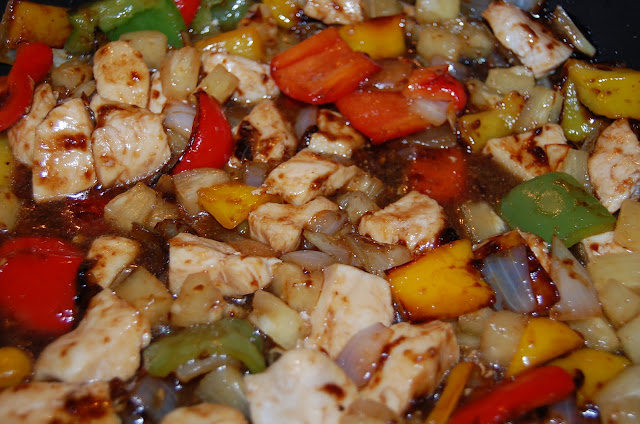
Once the goods are good and cooked, you add in the black beans and corn, let it blend in for a minute or two, then add that shredded chicken and the seasonings, to taste.


Once it was heated through, I threw it over a bed of tortilla chips...


...then tossed on a little cheese and a bit of salsa. Delicious!!


I added a little chicken broth to keep the leftovers moist and let it simmer a little longer, since the leftovers will be killer! My plan for tomorrow is to throw a little of this between two tortilla shells with a little cheese to make a little quesadilla - and I can't wait!

I have no idea what the name of this recipe is, so I'm making it up lol

Chicken Tortilla Soup

DISCLAIMER
I'm going to start by putting a disclaimer on this puppy: IT WILL TAKE YOU FOREVER TO MAKE THIS!!

And it's not that the recipe is complicated - it absolutely is not. But when you're dicing 6 different veggies, and shred 2 large chicken breasts, it's just tedious, and well...it takes time. So if you have 2-3 hours to make this, go for it - you won't be sorry! But if you're looking for a quick soup, look elsewhere.

Backstory
I decided to try this the first time a couple years ago when I was expecting my Mom and sister in town to celebrate my 26th birthday. I thought it'd be nice to have a pot of soup on for supper that day, so I found this recipe on SparkRecipes.com (again - a GREAT resource for healthy recipes) - thanks sparker AUTUMNINNY.

The Recipe
2 lg chicken breasts, poached and shredded
5 small carrots, chopped
2 Tbsp olive oil
1 large orange bell pepper, diced
1 large green bell pepper, diced
1/2 large yellow onion, diced
1 (28oz) can crushed tomatoes (or 3 1/2 C chopped fresh tomatoes)
1 (32oz) box chicken stock
1 small package frozen corn
3 finely chopped chipotle peppers (REMOVE THE SEEDS!!!)
1 (15oz) can black beans
salt and pepper to taste

Topping (optional): corn tortilla chips and shredded Monterrey jack cheese

The Prep Work
Remember that part where I said this recipe took forever and a day to make? Yeah, the prep is the biggest part. I started by dicing and dicing and dicing for what seemed like hours.

The carrots


The 2 different bell peppers, onion and chipotle peppers


Let's Get Started
First, I poached (a.k.a. boiled) the chicken breasts for 20 minutes in a boiling pot of water with salt and a few bay leaves.


While I was waiting for the chicken breasts to cook through, I sauteed the carrots in 1 Tbsp olive oil for 10 minutes in a large skillet, until they were nice and soft.


I then added the peppers and the onion and sauteed in yet another Tbsp olive oil until they were nice and tender.


Once the chicken was poached (i.e. done boiling), I got to work shredding it.


When everything was cooked nicely, I added it to a large stockpot, along with the shredded chicken, crushed tomatoes, corn, black beans and chicken broth.


You let it simmer pretty much as long as you feel like. I generally only let the flavors blend about 20 minutes or so, but I don't think longer would hurt.

You really won't be disappointed in this, but WHOA does it ever take time to make.

Friday, October 15, 2010

Chicken Pot Pie

With all the pies I've been making lately, it was only a matter of time before I decided to put more than just fruit inbetween those flaky crusts. I came across this recipe for Chicken Pot Pie while flipping through my Lipton Soup Mix Recipe book I picked up a while back at a book fair at work. I decided that with only 4 ingredients (besides the crust), it was worth a shot!

The Ingredients
2C cubed, cooked chicken breast
10oz pkg frozen mixed vegetables
1 pkg Lipton Golden Onion Soup Mix
1 1/4 C milk

The Process
I started out by making my favorite, super-simple double crust recipe from my Betty Crocker Cookbook.
I combined the ingredients, (2 1/4 C flour, 3/4 C shortening, 3/4 tsp salt, 8Tbsp water), split it into 2 parts, rolled the first into a sloppy circle, placed it over the pie pan, and put it aside.


I then took a large chicken breast and sliced and diced it.

And then I put it in a pan with some olive oil to cook until no longer pink.


And then, of course, there was the ever-so-important sauce: milk and soup mix packet. I boiled it for a minute.

Once the chicken was all cooked up nicely, I combined the chicken cubes with the frozen mixed vegetables, and voila:

Once the sauce was all thick and delicious, I poured it all over the chicken and veggies.

Then I did the roll the crust out part again, topped the pie with it, and crimped the edges. Oh, and put a few slits in the top.

I then fed it to the Kelvinator at 400 degrees for 35 minutes.

And then the Kelvinator gave it back up, looking stellar!


The full menu for the evening included a yummy salad and some fresh Rhodes dinner rolls:

Monday, October 11, 2010

Chinese Craving - Sweet & Sour Chicken

It's no secret that this girl LOVES Sweet & Sour Chicken. It is most of the time the only thing I will order at a chinese restaurant, and the main portion I would put on my plate at a chinese buffet. I crave it. Regularly. Unfortunately, when I really started taking a look at how absolutely horrible restaurant-prepared Sweet & Sour Chicken is, I realized I HAD to come up with a more healthy alternative in order to continue to enjoy this delicacy.

For those of you who are thinking, "Aw, come on, Amy - stop being so health-conscious and just sit back and enjoy it and forget about the calories," I think once you see the stark, cold numbers, you'd have to agree with me. A normal size portion of Sweet & Sour Chicken (with the crispy chicken, of course) runs you between 900-1000 calories! I don't even want to THINK about how many fat grams we're talking. That's the equivalent of downing a quarter pounder with cheese and large fry from McDonald's (and, of course, downing it with a DIET Coke lol)

So I began searching my favorite recipe site - SparkRecipes.com - to find a healthy alternative, and found a fantastic one! So thanks to SparkRecipes contributor HAPPYWALKER for this incredible recipe!!

The Ingredients and Prep
It starts with a bunch of dicing: 1 each of red, yellow and green peppers, and 1 onion

And, of course, getting my brown rice going in my rice cooker.

This time I did a pretty bad job of remembering to take step-by-step pictures, but in a nutshell, you begin by dicing up 2 large chicken breasts, pan frying them in a Tbsp of olive oil until no longer pink, then removing them to a covered dish (to keep warm).

Then, you add the diced veggies into the pan and pan fry in another Tbsp of olive oil until tender. (Disregard the carrot in this picture - I technically didn't take it for THIS recipe, but you get the idea...)


Then, you add the chicken back in, along with a combination of soy sauce and cornstarch; Combine, then, add the chunk pineapple with juice, cider vinegar, brown sugar, garlic powder and ground ginger to the pan and stir in.


Let simmer for 15-20 minutes until it has simmered down a bit.

Serve over rice!

Yeah, this little puppy is only 231 calories per serving! The recipe is supposed to make 4 servings, which means that even if you ate all 4 servings yourself, you're STILL under the number of calories for ONE plate of S&S Chicken at a chinese restaurant! Of course, you have to add in a few calories for the rice, but over, a MUCH healthier alternative. And TBH, it totally quenches my longing for S&S Chicken. In fact, the in-restaurant stuff makes me kinda gag over all that fried greasiness!

So....吃个饱!! (a.k.a. "bon apetit" in Chinese)

Sweet & Sour Chicken
Ingredients:
  • 1lb boneless, skinless chicken breast, cubed
  • 2 Tbsp olive oil
  • 1 each green, red, yellow peppers, seeded and chopped
  • 1 C onion, chopped
  • 1/4 C soy sauce
  • 1 Tbsp cornstarch
  • 1 8-oz. can chunk pineapple
  • 3 Tbsp Apple cider vinegar
  • 3 Tbsp packed brown sugar
  • 1/2 tsp garlic powder
  • 1/2 tsp ground ginger
Directions:
  • Sautee chicken in olive oil in a frying pan. Remove and keep warm.
  • Add veggies to the frying pan and sautee until crisp tender.
  • Return chicken to the pan.
  • Mix the cornstarch and soy sauce together and add to pan.
  • and add the rest of the ingredients to make a sauce.
  • Simmer for 15-20 minutes, until the sauce thickens slightly and veggies are more cooked.
Serve over rice or chow mein noodles.

Autumn Favorite - Apple Dumplings

The Inspiration
Two years ago, I found myself with a couple free days in between a job change (WAHOO!), so I decided that I'd try a recipe I'd heard of for YEARS, but had yet to try.

To be honest, at this point in my baking "career", I had never even tried making a pie crust, and I'm kind of embarrassed to admit that my first dumpling experiment involved a store-bought, frozen pie crust that well...didn't turn out as wonderfully as initially planned. But homemade or store-bought crust, I don't think there's a way to ruin these puppies.

I was ecstatic to be able to test out this new recipe with one of my favorite cooks (beyond my Mom and sister, of course), Mark's Grandma Vi! (Let's reminisce, shall we?)


After attempting this recipe with Grandma Vi back in October 2008, I decided that I'd best not let another year slip by without trying out this yummy recipe again!  So I organized an Orchard and Dumpling Day with Grandma and some of my other favorite Johnson ladies!

The Orchard
First, of course, we had to check out the orchard and pick up some apples (and pumpkins for decor). We decided to try out the Ocheda Orchard (which is run by friends of ours from First Baptist Church), and we had so much fun finding the perfect pumpkin, and trying to snag a few apples that hadn't fallen from the trees already.


The Prep
We decided to use a recipe I found on about.com, trying 3 different types of apples: Honeycrisp, Haralson, and Courtland.
We started by washing, coring and peeling the apples. I used my handy-dandy little apple corer that I picked up off ebay after Grandma and my dumpling debut 2 years previously, in an effort to make prettier-looking dumplings :)


And while I stepped out for a few minutes, Cousin Megan decided to become Ms. Apple Eyes :)

We then rolled out the pre-made crust (thanks, Grandma!), cut it into squares, and placed each apple on a square. (I don't have a good picture of this step or the next)

Aunt Barb then filled each apple with a cinnamon sugar mixture Jess had mixed together earlier, and then dotted each one with butter Jess had diced up earlier (great job, Jess!).

We then folded up the edges of the pastry around the apples as best we could (we had some pretty large apples and were trying to make do with the pastry we had!)

Aunt Barb had simmered up some wonderful sauce to be poured over the dumplings before sticking them in the oven, consisting of butter, sugar, vanilla and cinnamon.


Then, in the oven they went!!


The Wait
While the dumplings baked (apprx 30-40 minutes for normal-sized apples, and more like 40-50 for the large Honeycrisp ones), and Aunt Barb basted them every 5-10 minutes, I made a quick trip over to check out the Fall Showcase at the Historic Dayton House B&B. It was so warm and festive, and I found myself some awesome new mittens (made from used sweaters - how cool!) for the upcoming winter!


I took the long way back from the Dayton House to Dean and Barb's house to check out some of the beautiful fall foilage around Lake Okabena (which was pretty, but lackluster compared to earlier in the week).
Earlier in the week

Orchard Day

The Finished Product!
As I walked back in the door, the dumplings were just coming out of the oven and cooling, ready for some hungry test-tasters!


It was a great day to spend with a few of the Johnson ladies, and boy do we have dumplings growing out of our ears! :) But they're just indescribable - especially with a scoop or two of Blue Bunny Cinnamon Ice Cream!

So thanks to Aunt Barb, Cousin Megan, Grandma Vi, and Sister Jess for such a fun day! And for those who couldn't make it, there are dumplings awaiting! :)